Compression Fitting Failures
14 Mar, 2025
A Guide to Crimping in the Electrical Industry
Crimping is a critical process in the electrical industry, ensuring strong, reliable connections that maintain electrical continuity and mechanical integrity. Poor crimping can lead to high resistance connections, overheating, and even catastrophic failures. Whether working on overhead (OH) or underground (UG) powerline installations, selecting the right tools and techniques is essential to maintain compliance with Australian electrical standards and industry best practices.
Understanding Crimping Equipment
Selecting the appropriate crimping tool depends on the cable material and size, volume of work, and accessibility of the job site. Below are the common types of crimping equipment used in the industry:
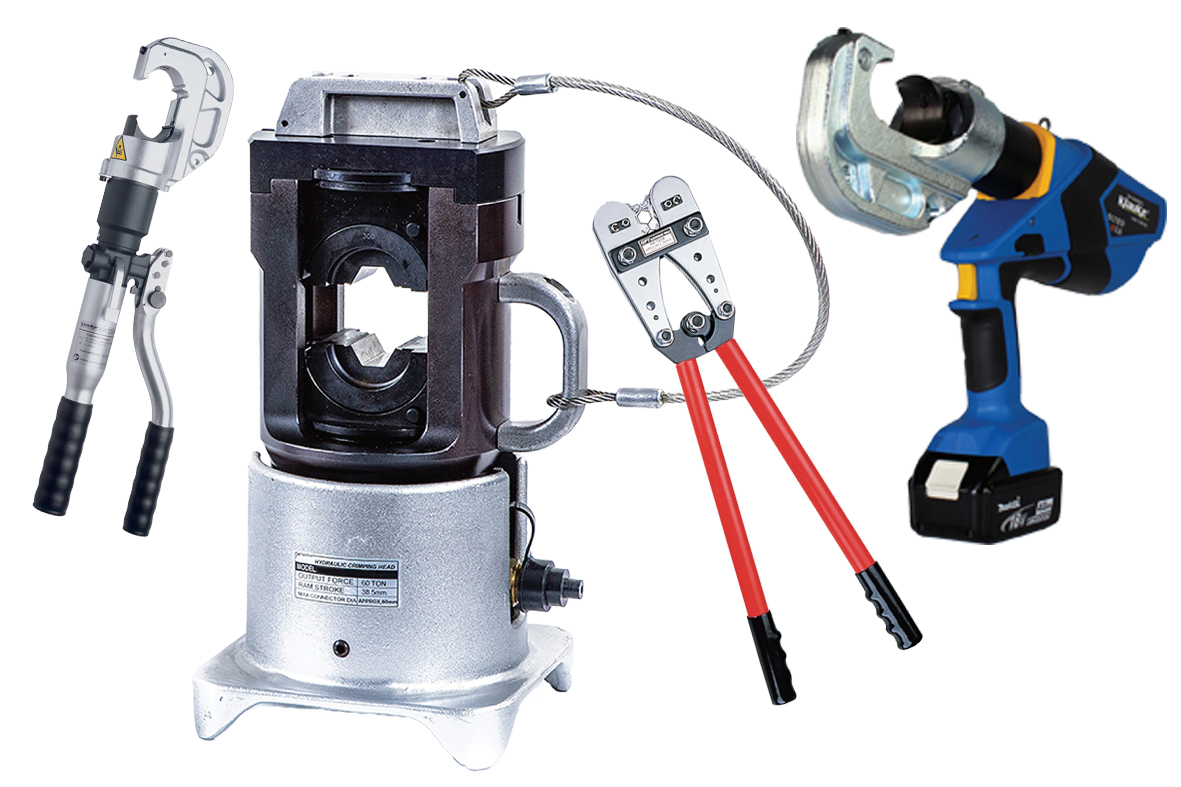
Hand Crimpers
- Ideal for smaller size cables and low-volume work.
- Typically used for comm. cables, instrumentation wiring, and light-duty electrical panel work.
- Available in ratcheting and non-ratcheting designs.
- Best suited for confined work areas, such as switchboard manufacturing.
Hand Hydraulic Crimpers
- Usually only available up to 12T, with some 15T versions available.
- Available in single, or two stage pumping for faster crimp cycles
- Provides consistent pressure, ensuring uniform crimping.
- Ideal for job sites where mobility is required, and access is relatively straightforward.
- Not a popular choice due to their manual operation, and safety issues related to RSI. However, they are a reasonably priced option compared to battery [powered options.
Remote Hydraulic Crimpers
- Same as Hand Hydraulic Crimpers and utilised where a higher crimping force is required, ranging from 6T to 200T
- Smaller units are excellent for confined areas, such as electrical pillars and pad mounted transformers.
- Up to and including the 12T versions are ideal for situations requiring remote operation such as Live Line work for safety.
- Higher tonnage units are primarily used for HV work in the transmission space where a higher force is required.
- Operated with hydraulic pumps, either manual, battery, electric AC, or petrol/diesel-powered.
- Because the crimping head is powered by a hydraulic pump, it allows the operation of other tools head, such as cutters and hole punches etc
Battery-Powered Crimpers
- Suitable for medium to high-volume applications, usually up to 25T
- Features include automatic retraction, pressure monitoring and crimp recording.
- Offers portability and reduced manual effort, increasing efficiency.
- Ideal for medium and limited high voltage work.
- Due to their portability, and crimping range, battery powered crimpers are a popular choice for Distribution, and industrial applications
Selecting the Right Crimping Dies
With crimping tools that utilise separate dies, matching these correctly to the lug, link, sleeve, or terminations is crucial. Incorrect die selection can lead to hot joints and weak mechanical strength. It is imperative you check the die sizing with the sleeve manufacturer
Key Considerations for Die Selection
- Cable and Lug Compatibility: Always refer to manufacturer specifications.
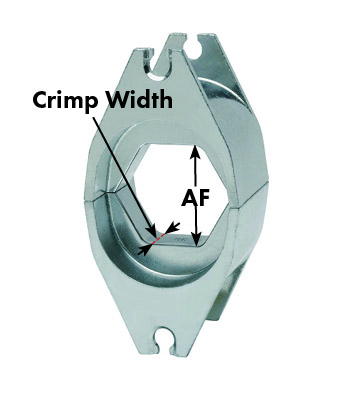
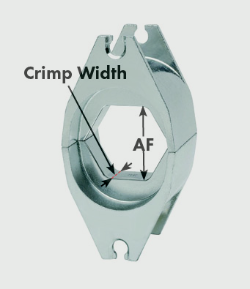
- Die Identification: Die sets are identified by an across flats (AF) measurement, which is matched to the lug, link or termination. This measurement is usually etched on the die face, which transfers to the surface of the item when the crimp is complete. This can be a visual check to ensure the correct crimp die has been selected. Another element to take into consideration is the “Crimp Width”, this will be determined by the tool tonnage and will be indicated in the link manufacturers specifications.
- Compression Ratios: Ensuring proper deformation of the lug/link etc to form a solid electrical bond with the conductor. This is directly related to the AF measurement.
- Die Types:
- Hex dies are the most common and has become an industry standard.
- Round dies are still used for some crimping application, and are also available for rounding sector UG cables
- “C” Crimp style dies, used for copper earthing connections
- Nest & Indent, common for UG sector cables. One half of the die has a dimple for indent and the other is a “V: shape for the lug/link to nest
- Hexagonal vs. Indent Crimping: Hexagonal crimping is the most common practice for crimping conductors; however, indent crimping is still used for aluminium conductors.
Crimping Techniques and Best Practices
Proper crimping technique ensures longevity and reliability of electrical connections. Follow these steps to achieve optimal results:
Step 1: Preparing the Conductor
- For UG cables
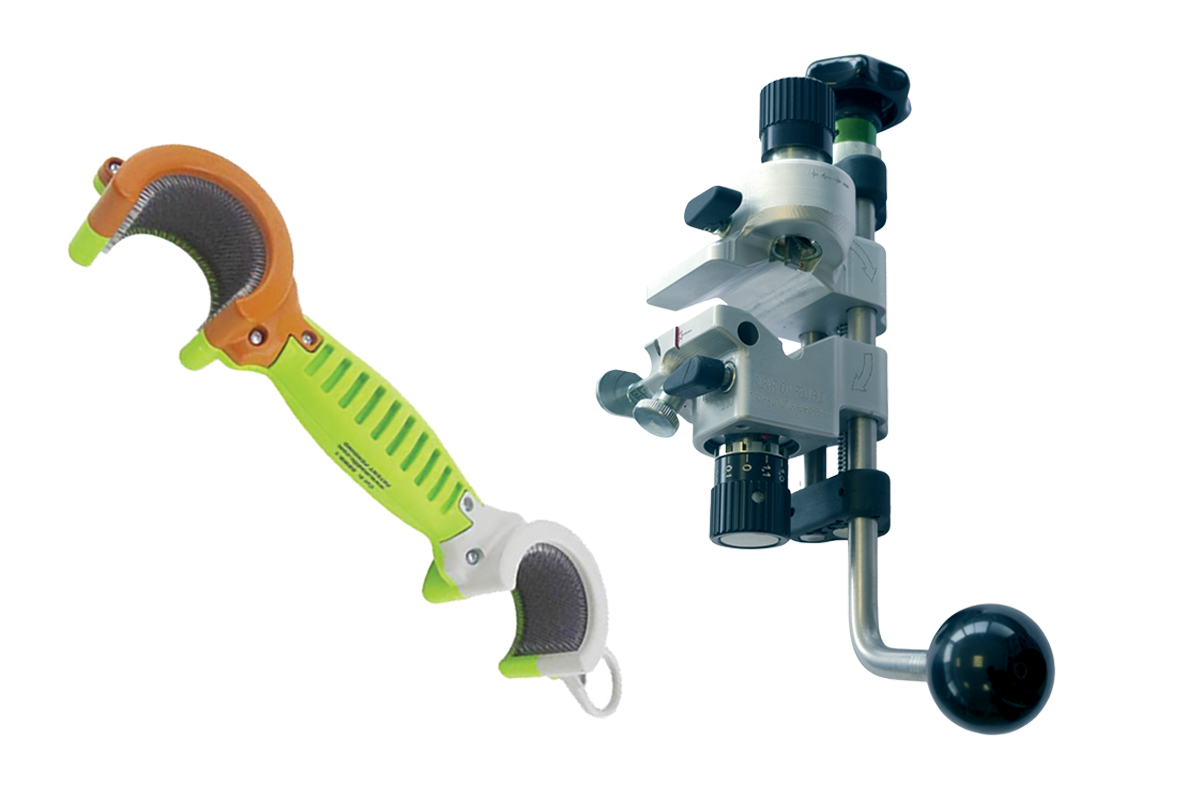
- Strip the insulation to the appropriate length without damaging conductor strands. View the video on the Derancourt POLY SCP stripping tool for MV cable.
- Clean the conductor to remove oxidation and contaminants and apply a conductive grease were required.
- For OH conductors
- Clean the conductor to remove oxidation and contaminants with an approved scratch brush, identify the correct brush by the conductor type, CU or AL
Step 2: Selecting and Preparing the Lug, Link or Sleeve
- Ensure the lug is correctly rated for the conductor size.
- Insert the conductor fully into the barrel. To ensure the conductor is completely inserted, measure the barrel length and mark this along the side of the conductor.
Step 3: Crimping the Connection
- Select the appropriate crimping tool and dies, specified by the manufacturer.
- Ensure the crimper has been inspected and is free from defects, fatigue and has been calibrated and in test date.
- Position the lug or sleeve in the crimper accurately.
- Apply the required number of crimps, as per manufacturer recommendations, starting from the inside or middle working your way out. Following this crimping sequence ensures even compression.
- Some battery-operated crimpers will make a sound when the correct pressure has been achieved, and another sound if the pressure has not been reached. Others will have a visual display indicating the pressure (700bar) or tonnage achieved.
Step 4: Inspecting the Finished Crimp
- Check for uniform crimping and absence of sharp edges.
- Verify that markings on the lug and die align correctly and the AF markings are visible on the compressed lug/link.
- The OD of the across flats on the compressed lug/link can be measured and matched to the die AF
Common Crimping Mistakes and How to Avoid Them
Even experienced electrical workers can encounter issues if proper procedures aren’t followed. Avoid these common mistakes:
Incorrect Die Size Selection
- Using undersized dies results in inadequate compression and mechanical failure.
- Oversized dies may not compress adequately, resulting in incorrect compression ratio.
Over-Crimping or Under-Crimping
- Over-crimping can weaken the connection and cause material fatigue.
- Under-crimping leads to loose connections that increase resistance and heat buildup.
Misalignment of Conductor in the Lug
- If strands are not fully inserted, it can lead to poor connectivity and hot joints.
Using Non-Compatible Crimping Tools
- Always ensure that the crimper, dies, and lugs are from a reputable manufacturer to maintain compliance.
Industry Standards and Compliance
Crimping in the electrical industry is governed by various standards to ensure safety and reliability. In Australia, key standards include:
- AS/NZS 4325 – Compression and mechanical connectors for power cables.
- AS/NZS 3008 – Electrical installations selection of cables.
- AS/NZS 4836 – Safe working on low-voltage electrical installations.
Conclusion
Proper crimping is a vital skill in the electrical industry, ensuring safe, efficient, and long-lasting connections. Using the correct crimping tools, dies, and techniques helps prevent failures and maintain compliance with industry standards. Always follow manufacturer guidelines and conduct regular inspections to guarantee the integrity of your electrical connections.
Contact TEN for all your crimping and cable preparation tooling requirements.
|

|